Showing posts with label DIY. Show all posts

Monday, April 30, 2018

Pasure Shelter 2.0

Last year we made our own pasture shelter out of cattle panels, a tarp and some pallets. Through the winter the constant wind just totally destroyed the t-posts that were holding it upright and the posts bent.

My husband the engineer later informed me it was because they weren't true t-posts, they were garden posts and were a "U" shape which allowed them to bend. They were also cheaper.... Ah well, you live and learn and go back and overengineer the damn thing a second time.

So with the engineer husband on board to just REALLY make sure this thing is still semi-permanent but unlikely to blow over, we set about correcting the original design.

The first one was open on two sides with the cattle panels arcing over the top. Good for shade and not a three sided shelter.

We had to add some cross bracing so that if the wind blew, there would be strong enough resistance to the sheer force.
The animals are happy to be on plentiful grass, and just in time as I've run out of hay and the hay guy I called and reserved 50 with has blown me off.

I bought a few 8ft 2x4s only to discover yesterday when we went to go attach them that we had spaced the shelter to be 8 feet wide. WOMP WOMP.

Engineer husband had a great idea though. We had spare plywood in the shed and that was 8 feet long. He grabbed one full panel and a second as well. We slid the 8ft full panel on the north side closer to the fence line then cut plywood panels to overlap the plywood and the end of the pallets. My useless 2x4s became useful as an additional anchor point on the inside of the plywood so that the nice long screws wouldn't cause issues.


Voila! The structure stands once again with no slanted support! And hopefully much better wind resistance. Until our budget allows for a better run in shed, this will be serviceable and is ready for the beginning of the season of them on this pasture while I let the winter one start resting.

It felt good to get this done. We're also digging out the winter manure and spreading it in the other summer and winter pastures. It's already dry and broken down so it's being used to fill low spots and fertilize everything else. Spring is finally here!

Wednesday, March 21, 2018

A Day Late but...

Happy Spring Equinox!

Tulips, Watercolor, by Amy (c)2018
The snow is gone from all but the shadiest spots. The temperature isn't quite warm but looks to be inching back up. Shedding season for Gwyn is on a roll and Saffron is stubbornly holding onto her coat still, which seems normal for her.

The seeds we ordered for our garden this year have arrived and we'll be planting those soon to get the starts nice and healthy before moving them outside. Once the nights stop being so cold we'll move the fish and aquaponics back outside. The goldfish have done well in the basement, the mojito mint just LOVES the aquaponics and the lemongrass did well too. Everything else got bug infested. We kept the spiders around though. Spiders are great garden friends.

I plan on making tea bags out of the mint. We have a dehydrator and I've got fill your own tea bags in my Amazon cart as we speak.

We will be rototilling the garden beds soon to prepare the soil for planting and adding more compost to them to beef up the soil level again, as things have settled through the winter.

Bring on the longer days and shorter nights!

Tuesday, January 16, 2018

Trailer Reorganization

One thing I really want to do to prep for show season this year is get my trailer organized and using the space efficiently for storage of necessary items. I take a lot with me, especially camping, and being able to store most of it in the tack room rather than the bed of my truck in totes would be very handy, especially since I put the tent up in the bed of the truck and thus have to unload everything first. This gets hampered when there is inclement weather. 

The current state of the dressing room in my trailer. AKA A Mess

Note the saddle pads and wool cooler thrown in haphazardly, the single saddle rack (I have the second in the barn), not nearly enough hooks, a whip holder installed by the previous owners, lots of buckets, my cross country vest and a huge water container for rides where there isn't water available (like when I trail ride)

There's the water container and bonus spare tire.

Oh! And my tent, which I want to rewaterproof, but just threw in after camping in October.  I'm so on top of things

NEED MOAR HOOKS.  There is also a handy dandy mirror on the left there as well as a packing list for a not my kind of horse show, haha. 

In trying to get the door open I basically removed weather stripping. It had frozen to the door. So that's another thing that needs to be fixed, probably on a day when it isn't freezing so that the adhesive will work better.
I made this spiffy paint drawing for my husband when I was talking to him about what I wanted to do. See the amazing 3D rendering!?

THE PLAN

But seriously, the water tank creates a lot of dead space all above it. I think I'm going to need to pinterest for more ideas (because alas, pinterest can be useful for aggregating ideas for stuff like this) but someone suggested using wire shelving instead of peg board as it may be lighter.

Something like this:

The Floor plan, not to scale, but pretty darn proportionate if I do say so myself

Anyway, peg board or metal racks? Definitely build the shelves? I'd like to have a place to keep saddle pads, coolers and a first aid kit and that seems like a good way to do it. I do have a hanging saddle pad holder that could be attached to the shelves.

And how the heck do you attach things to the inside of the trailer? Do I need to learn to weld? Can I just screw stuff in? I am so lost here.

Monday, November 13, 2017

Ready for Hunting Season!

This is a project that I've had in the pipeline for about a year now. The main gist is that I wanted to have something for cold weather that could function both as a quarter sheet and as a big orange flag to hunters that we were not a deer. As rifle season starts in two days, I finished this just in time!

Kaylee made this herself! It's a purse made with my scrap pieces and is held together with rare earth magnets. It's pretty ingenious engineering, and modular to boot!

So materials list are:
2 yards of your fav fleece material. Every so often JoAnns (if you're US) has a sale on fleece. Go then.
3-4 packages of double fold bias tape quilt binding (A total of 9-12 yards)  NOTE:  9 yards was about 8 inches shy of what I needed. You may get more out of your binding if you don't make as big a hole.
1 foot of 3 inch wide velcro
sewing machine
thread

Here's my diagram. It's minimal cutting. Woo!

I folded my fabric in half such that it appeared when draped over a horse's backside it would be of a decent length to either side. Then I cut in along the fold but not all the way through. I made crescent cuts until I had opened up the middle of it so it would go around my body, while leaving the flat entrance.

Then, I put the quilt binding bias tape along the edge, pinned it in place and sewed it on. I didn't take many pictures of the sewing step. Sorry.

Sewing on the bias tape.
Once all the bias tape was sewn on, I separated my velcro pieces and pinned them in place on each of the fleece such that the flat sides where I cut could overlap and the velcro would attach to itself.  That's represented by the black and gray strip. Imagine the gray being on the underhalf of the fleece.

Ta-da! You're done! Unless you want to add a tail rope, which I might do at some point.

Looks pretty good if I do say so myself.

The attachment with the velcro

See? Velcro!

Draped over Gwyn's butt, nice and orange! No mistaking us for deer!
I still need to test it during a ride but I'm pretty sure it will fit me better than the one I bought. The goal is for it to go over my legs to keep me warm too. It could also fit under a saddle flap if I wanted.

I'm pretty proud of this! I winged it hardcore and there was some anxiety as I cut into the fleece. No going back!

All for less than $30!


My next project is a riding skirt that can also function as a quarter sheet. And once I perfect that I'm going to splurge on some nice waterproof outwear fabric and make it from that for rainy rides.

Thursday, November 2, 2017

Prepping for Mud

In a first for me, I decided to try doing a mud knot for Gwyn's tail to keep it up and out of the muck and mud as winter trudges ever toward us. We've had enough rain at this point that the creek has water in it. Saffron is making the most of the water and drier areas of the runs.

Tonight after the girls were in bed I headed out to do barn chores and decided that tonight was the night. Gwyn was getting her mud knot.

So after making up the grain and filling hay bags, I pulled Gwyn out and started grooming.


 First step was to get all the knots out of her tail. It's been a while since I did a thorough brushing so it took me a while to work through all the hair. Her friesian side is really strong with her mane and tail and she's got a LOT of tail. It grows well too and usually is near to or dragging on the ground. I used a human hair product that's basically just silicone dioxide for getting rid of tangles.


Look at that beautifully brushed tail that nearly touches the ground. LOOK AT IT.


So after brushing it you braid it. Start the braid below the tail bone. You want to leave a decent amount of room. I elasticed it off. Then you wrap it in vetwrap or similar self adhesive wrap. If it's fly season, apparently you add baling twine to act as the horse's tail to swat flies.

Final product. The vetwrapped part can swing freely and it keeps her tail up and out of the mud! We'll see how it goes. It didn't take me long to do, so I'll redo if necessary and/or reevaluate.

Sunday, August 13, 2017

Making Sweet Relish!

So, our garden has been abundant this season! We had collected around 9 lbs of cucumbers (which is a lot of cucumbers by the way) and I knew that I had to SOMETHING with it so that they wouldn't go to waste.  That's really my main goal with our garden; not wasting the food we're growing.

To that end, I grabbed some canning supplies, a premade mix of spices for making sweet relish, and pulled my big pots out from the back of the cabinets. I spent all yesterday morning working hard at the stove to make sure things would be good. The mix estimated that I'd get 5 quarts. I got 7.

So... merry christmas family! You're getting homemade relish for christmas!

First step after washing all the veggies was to chop the ends off and then cut the cucumber up into 1 inch pieces. You then food process those smaller pieces. My processor could only do 3-4 cucumbers at a time.

You then add pickling salt (special salt just for pickling, table salt and kosher salt will leave sediment, apparently), mix well, and let it chill in the fridge for 2 hours. After two hours, strain it to get rid of the liquid.

Then, you use white vinegar, sugar and the pickling spices and cook it for about 10 minutes at a simmer. Then you add the strained cucumber bits and boil for a bit.

Meanwhile, get the canning jars and lids nice and hot and fill them up with 1/2 headroom. Finger tighten the lids. Then set them back in the water bath and process for 15 minutes (we're pretty much at sea level, increase according to your altitude)

Pull them out to cool for 24 hours. Test the seal with the popper on the lid. If any can pop, refridgerate and use within a week. Otherwise, they have a shelf life of 1 year. I labeled the lids with the date and year so we know.


My next project is to make spaghetti sauce with all of our tomatoes and now that I've gone through one canning session with the equipment I have, I know what I need.  For one, a bigger pot. The other jars I have are all full pint size (the relish in in half pints) and my biggest pot will not get an adequate 1 inch of water above the pint jars. Also, the pot I ordered comes with a rack so I can drop the jars in all at once and it keeps them off the bottom of the pot to reduce clanking from the bubbles while boiling. I also snagged a bigger scoop for easier filling (I already have a funnel) and some dissolveable labels.

I'm excited!

Monday, June 12, 2017

Updates!

Heyo, fell off the blogging bandwagon for the farm for a while.  But boy do I have some awesome updates to share! This will be picture heavy, so buckle up kids!

 April
Our seed starts were doing awesomely and we need space to put them when they got bigger.

Our tiny strip of grass right in front of the house seemed like a good candidate. It gets lots of sun, even in non-summer months, it's flat (slightly sloping), near a water source (garage) and a pain to mow.

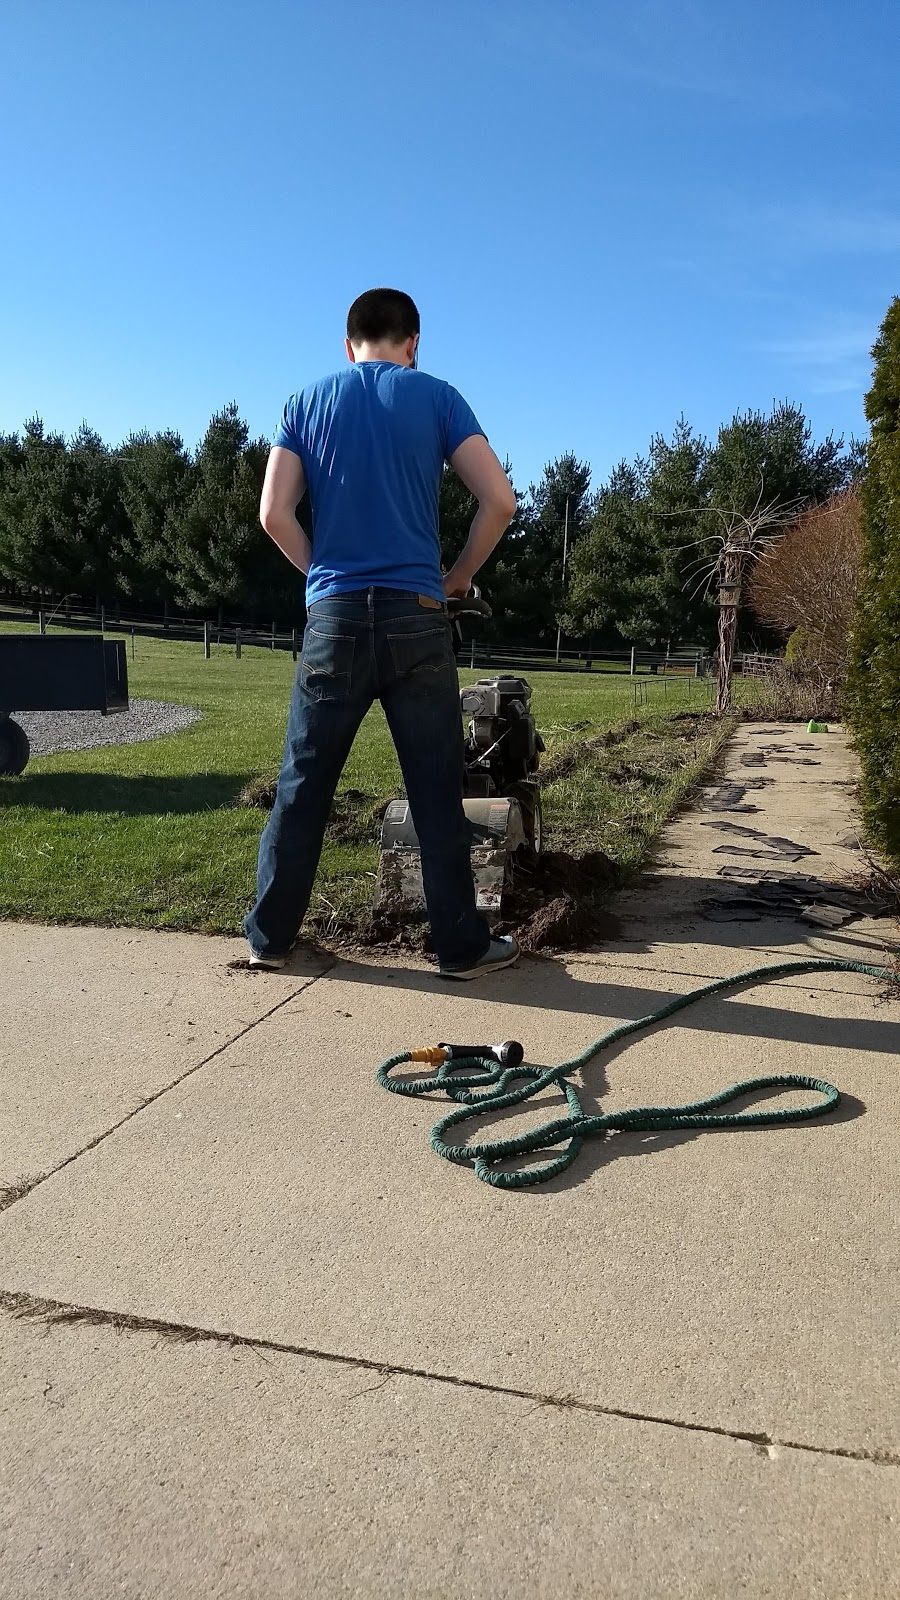
It became the designated garden spot. First, we removed the border edging and stones

Then it was rototiller time!


Snek!

We painstakingly sifted through the soil to remove the grass clumps from rototilling and preserve as much original topsoil as possible for leveling. 

Leveling with cinderblocks used to determine how much of a section would need to be finished to do one bed.

One garden bed base in!

More sifting and leveling to go, putting in a base of manure for extra nutrient boosts.

The ATV and cart were very useful!


Our delivery of cinderblock and paver stone!


We also filled the cinderblock segments with manure and dirt for more garden space.

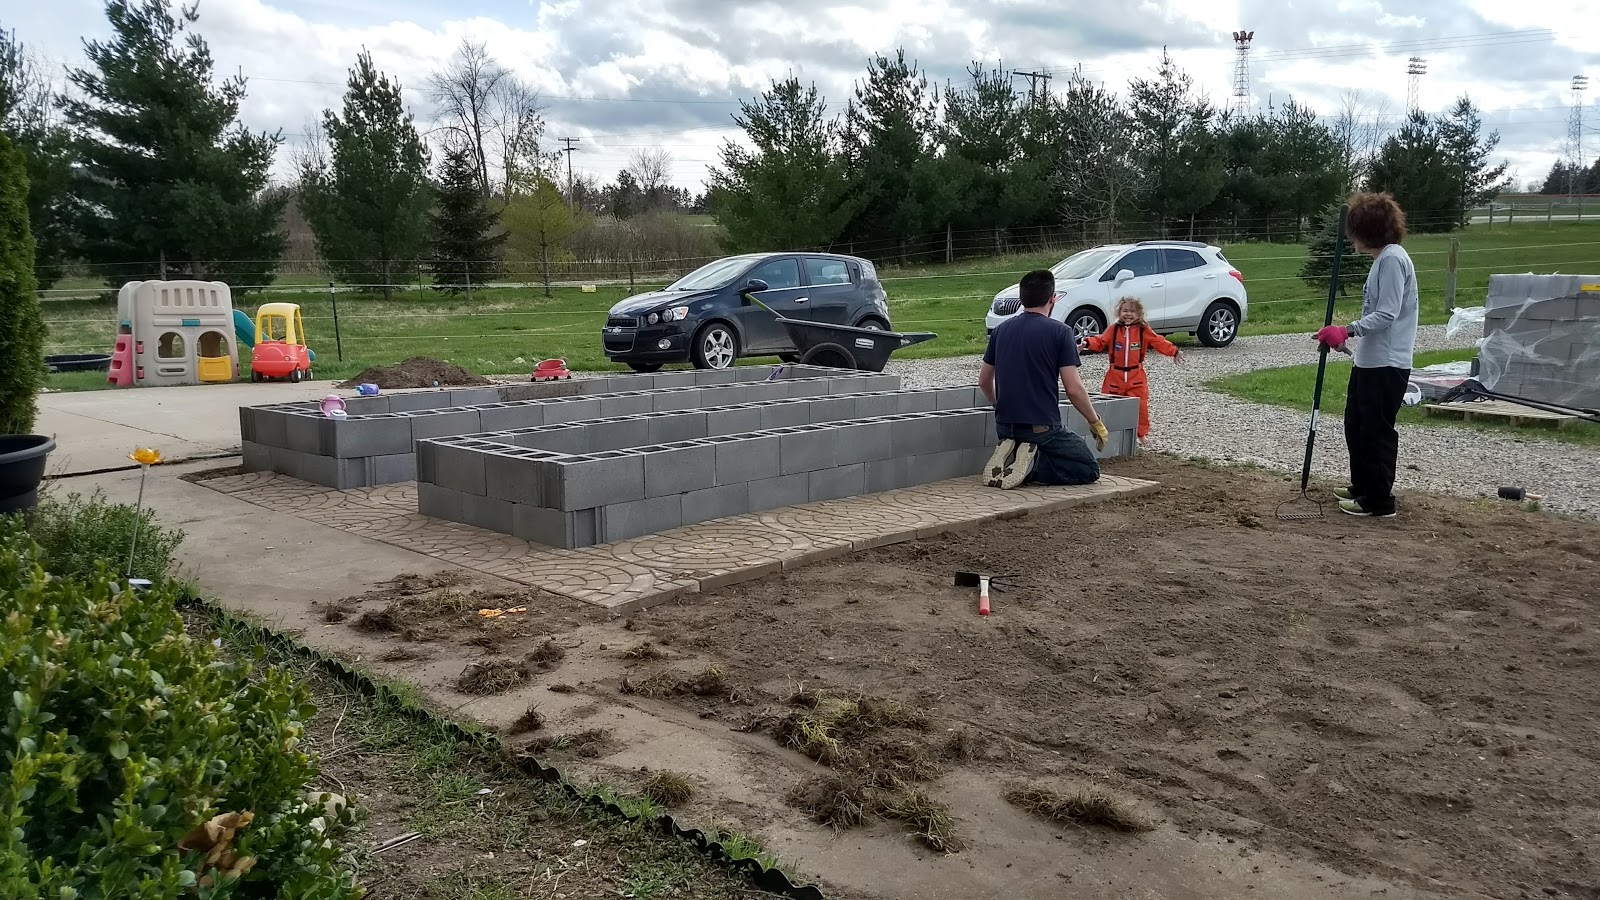
Paver stones going in as well. This was tedious, backbreaking work.

Pretty patterns

We had help from family too


You can see the sifted grass clods

More beds go in a little at a time

Even the baby picked up a rake

Apple trees start to bud

We also got a shipment of trees from the Arbor Day Foundation and designated the old garden bed as the tree nursery for the baby trees.


I had been away for most of the day and just wearing her sent her straight to sleep, despite the rototiller.


Making sure the beds look level

In the meantime, I started introducing Gwyn and Saffron to the spring/summer pasture. 

And mowed for the first time this season. It was sorely needed.

We had a several year old manure pile that was begging to grow some veggies, so we used that first to fill the bottom of the beds.

We found a cool pupa! It wiggled.

With three levels of blocks and a base of manure compost, we planned to do topsoil on the top.

May

We ordered several yards of topsoil to be delivered by a local landscape supply place. It was getting real!


The apple trees blossomed

And the first bed is ready for plants with a layer of top soil over the manure compost!

We also got polymeric sand to fit in between the spaces of the paver stones to lock them in place. It's also supposed to prevent weeds from growing and ants from going through, but our ants have kind of laughed at it and gone and made tons of mounds anyway. There were a lot of ants living in the space we dug up... 

Only one bed is 3 blocks high, the rest still need another level at this point. 


So we bust butt and realize that we didn't order enough cinderblocks or paver stones to fully finish.

But we did have a helper to keep the topsoil from spreading all over the driveway.  We ended up covering the pile with tarps too.


A trip to Home Depot with the truck and the final materials were acquired. The last bed got a load of straw in the bottom with compost on top and then the remaining top soil. We should have done more manure though because the straw didn't compress right away and the whole level of the bed has sunk. It's kind of amusing.

We had pretty skies on the way

And lots of apple blossoms


Hazel is a soil connoiseur. 

The garden beds have become our after work spot for play. I water the garden and the kids play in the water and look for changes as the fruit and veggies mature.


And our plants start going in! We did do any fruit starts, so those I purchased. Each bed is themed. The first two (closest to the driveway) are tomatoes, peppers and onions.  The third bed is fruits, so we have blueberries, strawberries, raspberries, blackberry and watermelon. The fourth is beans, peas, corn and pumpkins!

Eric teaches Kaylee how to set things on fire with a magnifying glass. SCIENCE!


The fruit bed.

And we finally get to move our tomatoes out to the garden beds! They had been taking over the house. And boy have they loved it.

More apple tree


Looking sparse, but now they are just bushy and thriving


A good way to entertain kids is with paintbrushes and buckets of water. They can't hurt anything and it keeps them cool in warmer weather.

And we had a brief escape and walkabout wherein I nearly had a heart attack but they are safe and sound.

Robin nest you can see from Kaylee's room.

I left the horse trailer open and some enterprising birds made a nest in my hay bag.


LILAC SEASON!  I love lilacs. They are my favorite flower and scent, hands down. I finally have lilacs that are blooming (my bush in Washington never bloomed before we moved and the new owners tore it out D:) I'm looking forward to next near and MORE blooms!

The nest in front of Kaylee's window has eggs!

Trip to the farm store for supplies for a separate project.

A shelter for the critters in the front pasture!

Bebe apples

Fat pony needs food restrictions until the pasture is eaten down a bit.

A spider living on my blueberry bush.

June (so far)

Our strawberries started ripening! We lost the first one to ants (I believe) and I took steps to bait them away after that. Darned if I'm going to lose out on my fruit! I'm growing it for me to eat! Well, and the kids too.

Baby blueberries


Corn is coming up from seed

Peas are starting to grow up. I've since added a line between the stakes so they have something to grab onto. In the lower right corner is a cuca melon that has a cucumber variety. A lady down the road sells plants and I got a bunch from her!

A perennial in our existing front garden.

Baby tomatoes

Lavender is starting to flower.

Taking the time to reinforce training after dinner.


Babies have hatched! Now we have screaming hatchlings!  Though I checked yesterday and the nest is now empty, so they've flown out!

And the piece de resistance.... With our front garden finished, we decided to move the aquaponics outside for the summer. We can work out cycling kinks where an overflow is forgiving to the surrounding environment (as opposed to inside) and we can take advantage of sunlight. 

It's a simple system. A pump in the lower trough pumps water up into the upper one, which is filled with clay pebbles. It fills up faster than it can drain through the spout. After a set amount of time the pump turns off (on a timer) and the water drains. So it's flooding and draining on a schedule. This allows time for the roots to get oxygen and then nutrients and not drown.

The water is a big draw for curious kids who want to stay cool and play. We haven't gotten fish yet (need to wait for the water chemistry to stabilize) but when we do, there will be protections on that lower trough.

We fit a piece of plywood that sits in the upper trough and holds slotted baskets for the plants.


More flowers in our central garden.


Ah sisters...

The central garden. Lots of milkweed, my lilac is out there too as well as the sapling sugar maple.

The hydroton and our mesh drain!

The plywood has holes drilled in for the basekts to sit with the plants. So the water rises and falls and the plants remain immobile.

And as sometimes happens... my hose broke, dramatically.

Just as I was filling up the horse water too. Thankfully we have a lot of hoses around the farm, and a fix was quick. We'll need to get a new hose though.

More plants added. The more plants we have, the more stable things will be once fish get added. In this picture are lemon grass (the tall grass), penny royal (for bug prevention), lavender, mojito mint, chocolate mint, and terragon.

Testing the water is important. I'm keeping a log.

I have helpers.


Oh... and the fireflies have returned   :)